Luxgrow's LPU series grow lights are designed to provide optimal lighting conditions for indoor plants, ensuring robust growth and high yields. These lights utilize advanced LED technology, making them energy-efficient and long-lasting. In this guide, we will explore the installation process, key features, and tips for maximizing the effectiveness of your LPU series grow lights.
Step-by-Step Installation Process
1. Gather Necessary Tools and Materials
Before starting the installation, ensure you have the following tools and materials:
2. Choose the Ideal Location
Selecting the right location for your grow light is crucial. Consider the following factors:
Height: The grow light should be positioned at an appropriate height above the plants to prevent light burn while ensuring adequate coverage.
Accessibility: Ensure the light is easily accessible for adjustments and maintenance.
Power Source: Locate a nearby power outlet to avoid using extension cords.
3. Measure and Mark the Mounting Points
Using a measuring tape, determine the optimal height for the grow light. Mark the mounting points on the ceiling or wall where the brackets will be installed. Use a level to ensure the marks are even.
4. Install the Mounting Brackets
Drill holes at the marked points and insert anchors if necessary. Secure the mounting brackets using screws, ensuring they are tightly fastened to support the weight of the grow light.
5. Hang the Grow Light
Carefully hang the Luxgrow LPU series grow light onto the installed brackets. Ensure it is securely in place and adjust the height as needed.
6. Connect to Power
Plug the grow light into the power outlet. Ensure that the power switch is off before connecting to avoid any electrical hazards.
7. Test the Light
Once everything is installed, turn on the grow light to test its functionality. Adjust the brightness settings according to the needs of your plants.
Learn about the installation of Luxgrow's LPU series grow lights, easy to get
Indoor Plant Grow LED Light Assembly Instructions:
Single Module Installation:
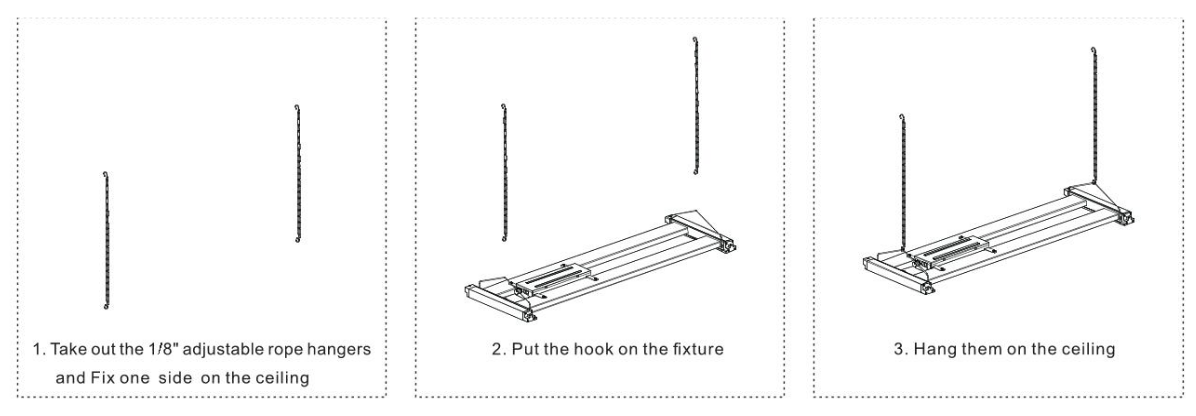
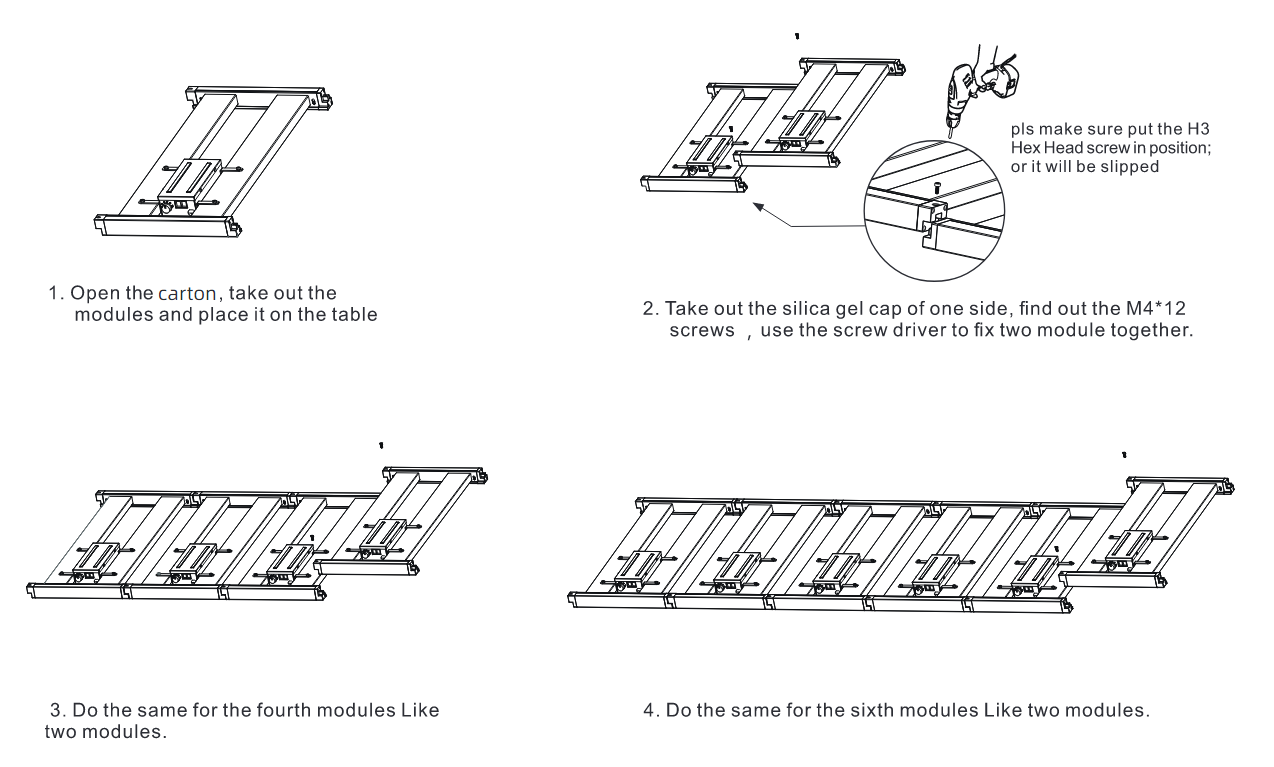
Multiple Modules Installation:
Step one:
Step Two:
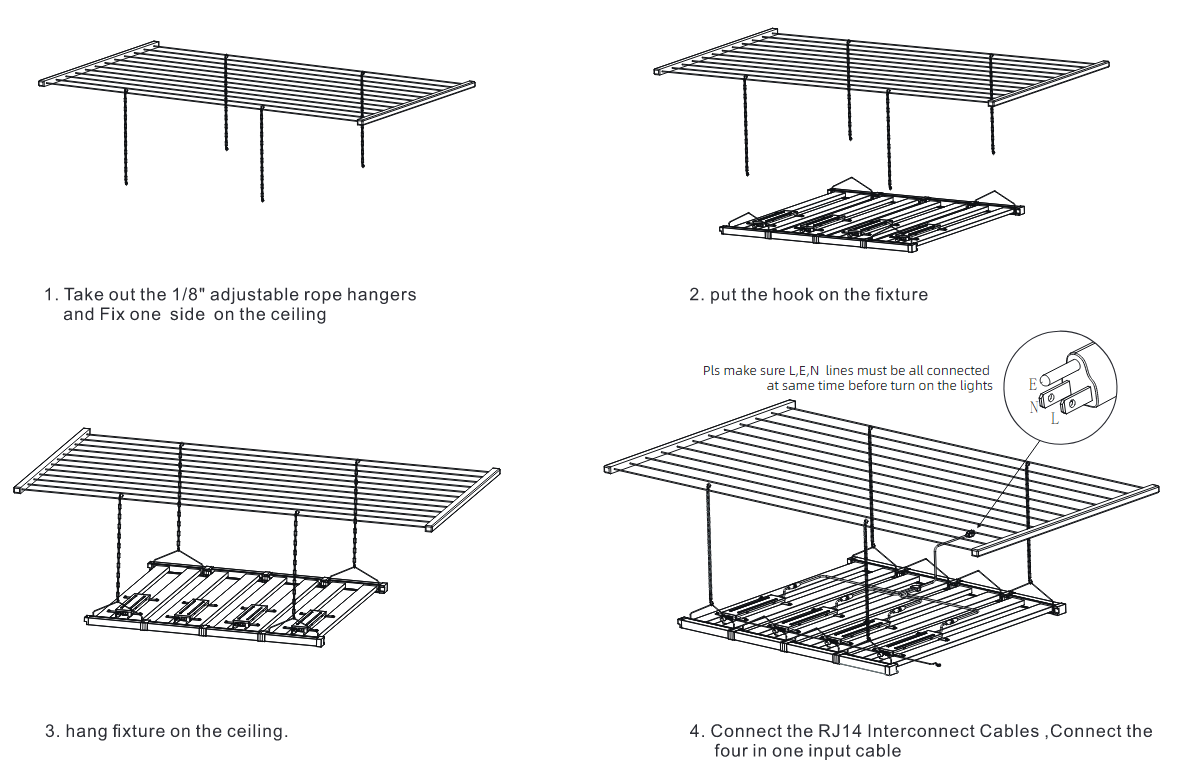
Wired controllerinstallation:

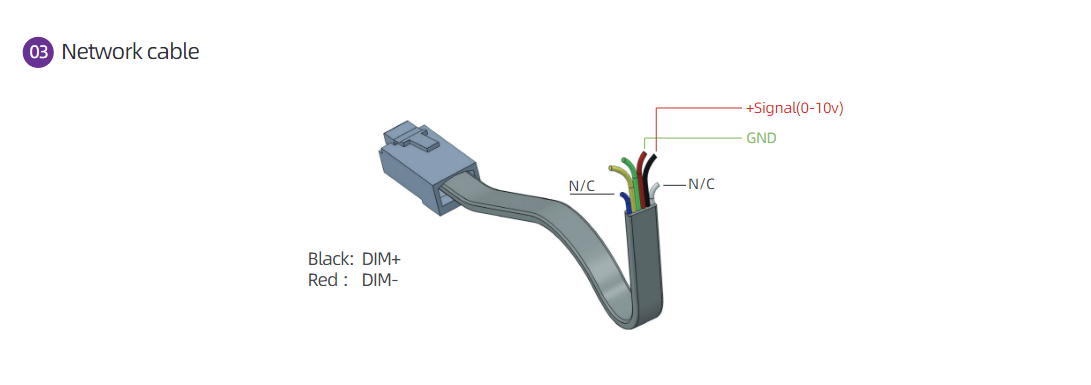
Multiple RJ14 Interconnect Cables one by one (400 modules maximum);
Plug one RJ14 Port into the controllers;
Control the fixtures by wired controllers
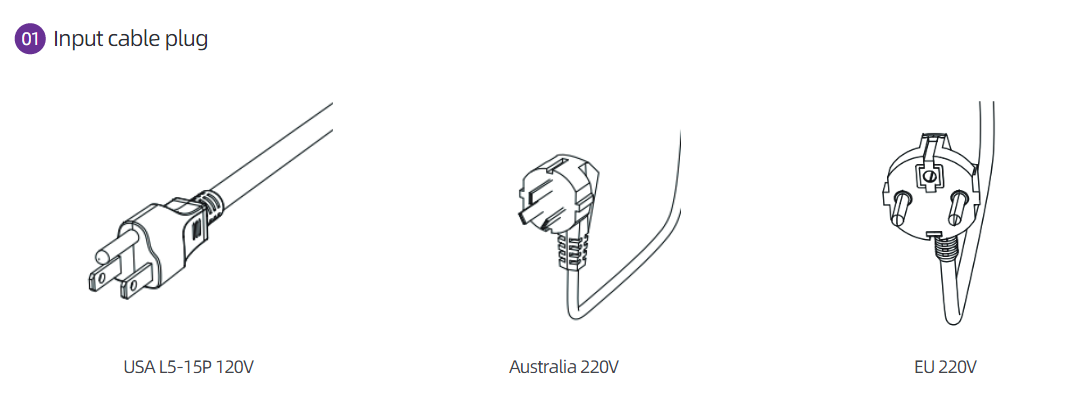
The plug should match the same standard socket and must connect E Line
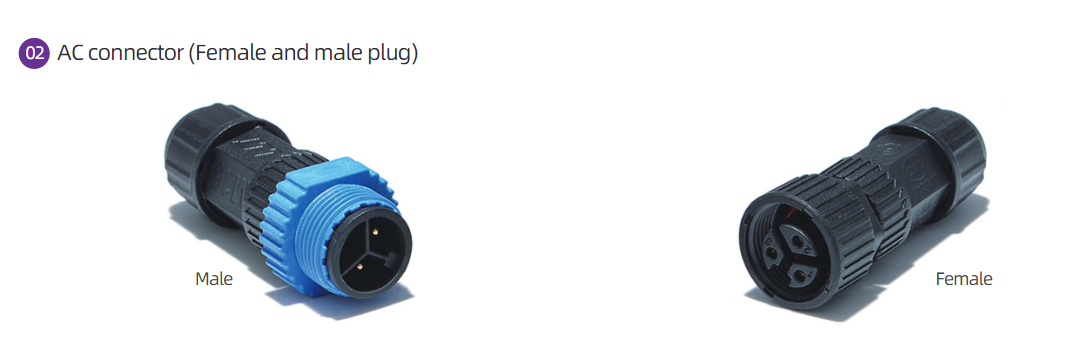
Pls check the pins of Male plug and make sure the male and female plug connect correctly.


)
) Company Profile
Company Profile
) Philosophy
Philosophy
) Development
Development
) Research and development
Research and development
) Production capacity
Production capacity
) Plants Grow Lights
Plants Grow Lights
) Agriculture Supplemental Lights
Agriculture Supplemental Lights
) Medical cannabis cultivation
Medical cannabis cultivation
) Agricultural planting
Agricultural planting
)
)
)
)
